
If you’ve worked with flows, chances are you’ve seen this before.
An unhandled fault has occurred in this flow
Kind of a vague error message but at least you know something’s wrong, the question is what though? It could be anything. Maybe the flow ran into a problem with some validation rules or tried to create a record but didn’t fill in a required field. It can be a little hard to tell, especially if you’ve got a complex flow.
Fortunately, Salesforce will automatically send an email that includes the error message, details about the flow, and a link to the flow in Flow Builder so you can troubleshoot things. But you don’t want to see error messages about unhandled faults in the first place, and you especially don’t want your end users to see them either.
So make sure to set up Fault Paths in your flow.
What are Fault Paths?
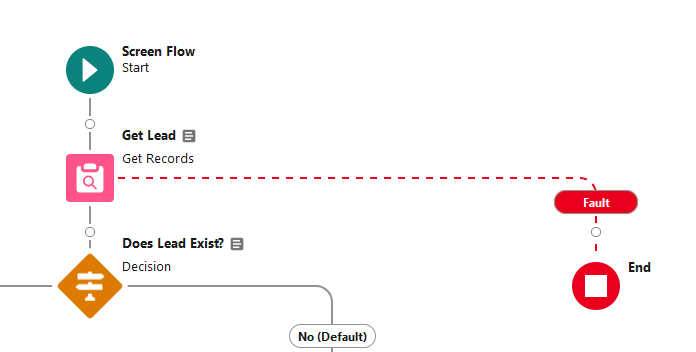
Fault Paths are a form of error handling in flows, they’re an alternative ‘path’ that a flow can take when one of the flow’s elements encounters an issue. Normally, if there’s an issue (an “unhandled fault”) then a flow stops and an error message like the one mentioned in the beginning of the article (“An unhandled fault has occurred in this flow.”) will appear.
If you’ve set up fault paths however, when a flow runs into a problem, it won’t show that “unhandled fault” error message. Instead, it’ll go down the fault path you’ve set up.
Depending on the type of flow in question, Salesforce might handle errors differently. As a best practice, you should create a custom error message that can better guide end users. Instead of the standard “An unhandled fault has occurred in this flow” you can provide them with information on what went wrong and directions on what they should do.
Fault Path on Auto-Layout
In Flow Builder, there’s an “Add Fault Path” option. This option is only visible if your canvas is set to Auto-Layout.
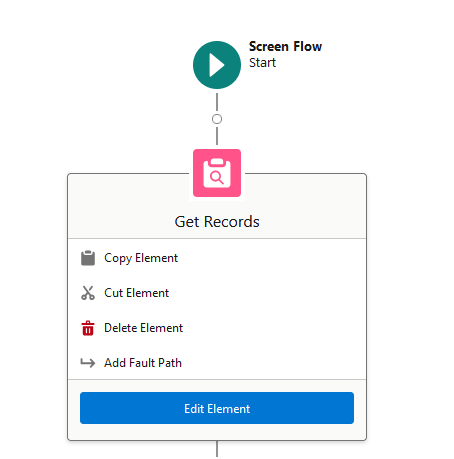
Click “Add Fault Path” and a Fault Connector will appear. Now you can set up your Fault Path.
Fault Path on Free-Form
The “Add Fault Path” option available in Auto-Layout isn’t available on Free-Form, but you can still set up Fault Paths just fine. There’s a prerequisite however, there has to be an element that’s already connected to the component you want to create a Fault Path for.
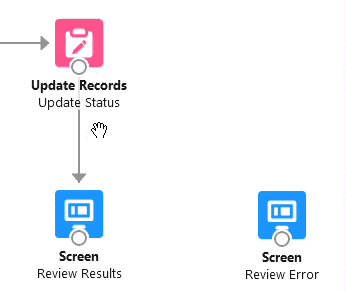
Let’s say you want to create a Fault Path for this Update Records element.
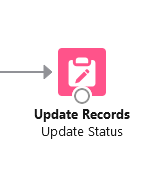
You need to connect it to another element first. Set up the regular, default path you want it to take, the next step that’s supposed to get executed assuming nothing goes wrong in the flow.
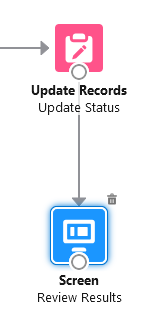
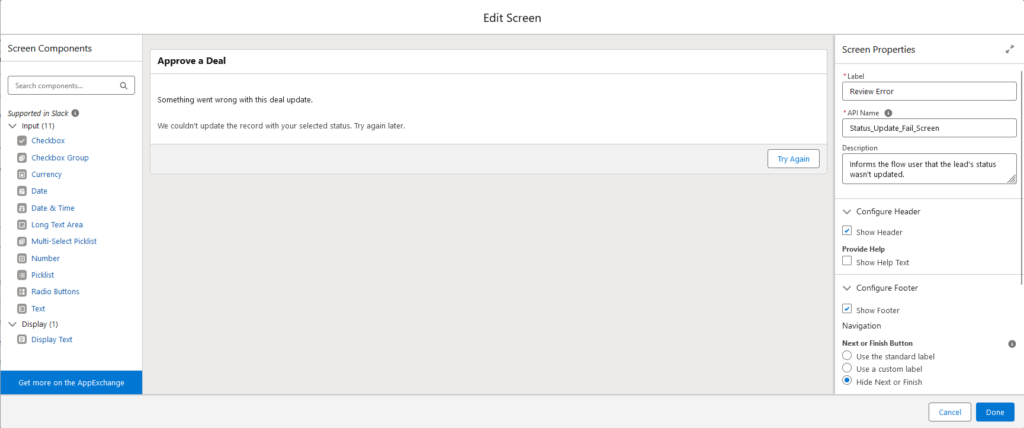
Now drag and drop the element you want to link as your Fault Path onto the canvas. For this example, the Fault Path will be a Screen with a custom error message.
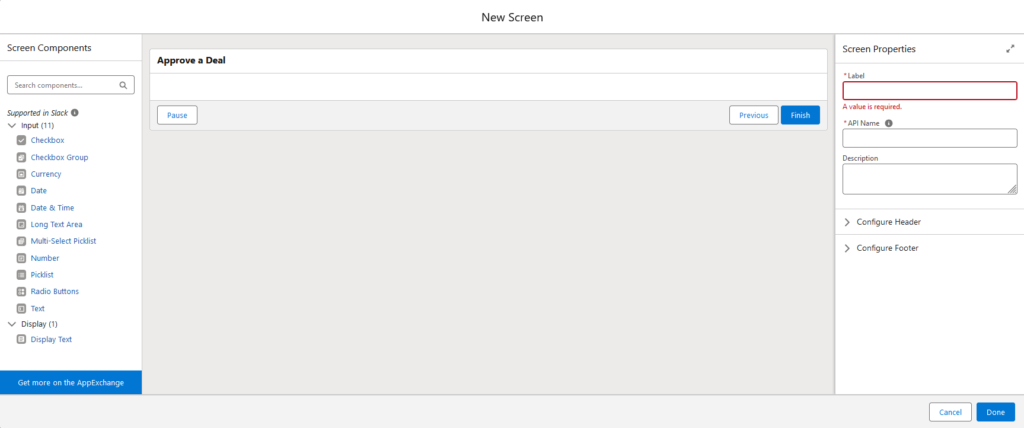
Fill in the details.
Now you’ve got an unconnected element on your canvas. Set it as a Fault Path by clicking and holding the white circle underneath the relevant element, in this case, that’s the Update Records element. Drag it to the unconnected element and it’ll be set as a Fault Path.
That’s it. Now all you have to do is test your flow and see if your Fault Path is working as intended.

